How to Deactivate Your Facebook Account and Reactivate It Later
Some desire a clean record for future careers, while others simply want to follow their therapist’s advice. In any case, there are numerous reasons to disconnect from Facebook.
But, before you do something you may come to regret, keep in mind that you can deactivate your account without permanently erasing it.
Consider a more temporary solution instead of going straight to the “delete account” page. Simply deactivating your Facebook account is significantly less of a commitment than deleting your account and permanently losing all of your images, friends, and other virtual memories.
When you deactivate your account, your timeline, photos, and personal information will be hidden from the public eye, safely stored in Facebook’s archive until you decide to return (if you feel like returning, that is).
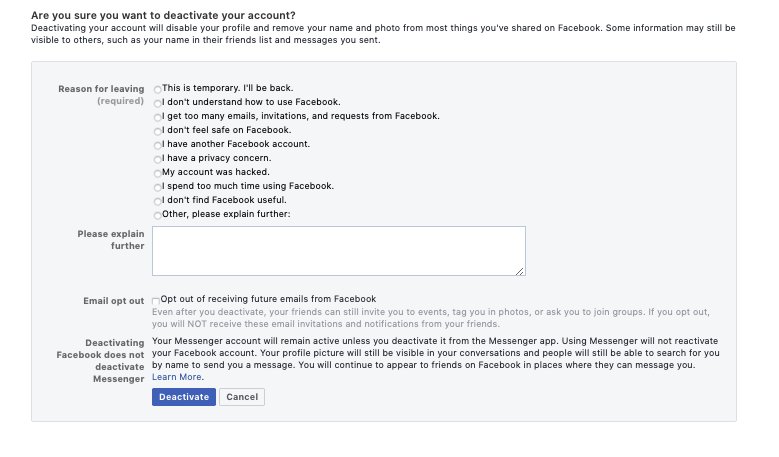
Some information will remain available, such as private messages and posts you’ve made on other people’s walls. According to Facebook, those with deactivated accounts can still interact on Messenger.
While your account is inactive, it will not appear in searches and friends will not be able to visit your profile.
Reactivating your account is as simple as deactivating it when you’re ready to return. When you come back into Facebook or use your account information to log onto another site, your profile will be completely restored.
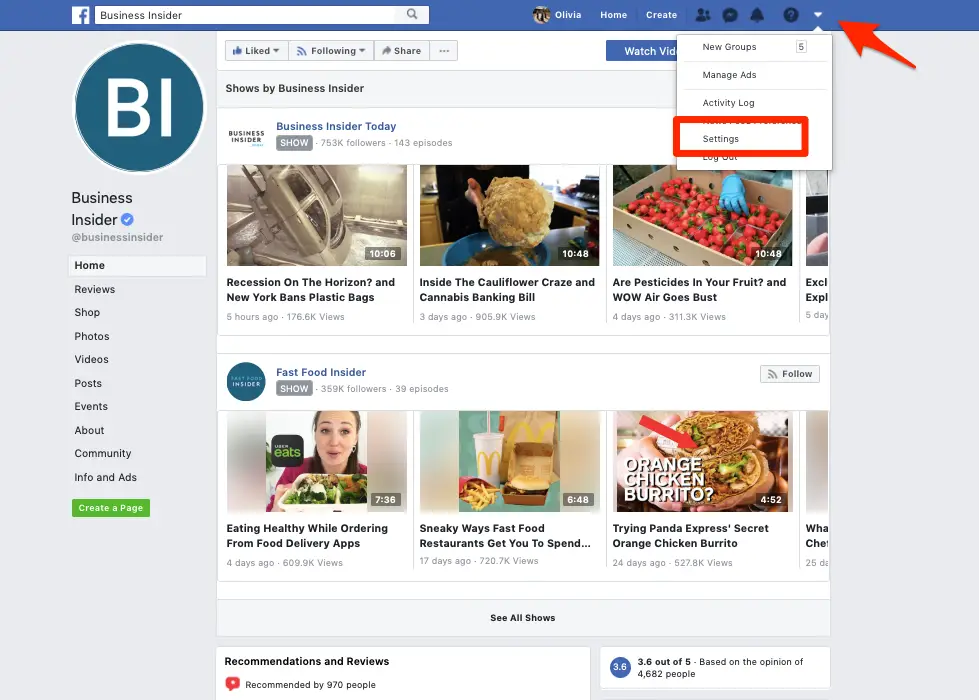
1. Locate and click on the upside-down triangle in the top right corner of any Facebook page to deactivate and reactivate your account.
2. From the drop-down menu, choose “Settings.”
3. Select “Manage Account” from the “General” page.
4. You’ll see a few alternatives beneath this selection, but scroll to the bottom and click “Deactivate your account.”

5. After clicking “Deactivate your account,” Facebook will prompt you to enter your password. Before you confirm the temporary deactivation, Facebook will urge you to provide a reason for leaving. Remember, you may return whenever you want.
6. To recover your account, simply log back into Facebook or log into a third-party app using your Facebook account. Facebook will send you a verification code to confirm that you are who you say you are, so make sure the email address or mobile number on your account is up to date.